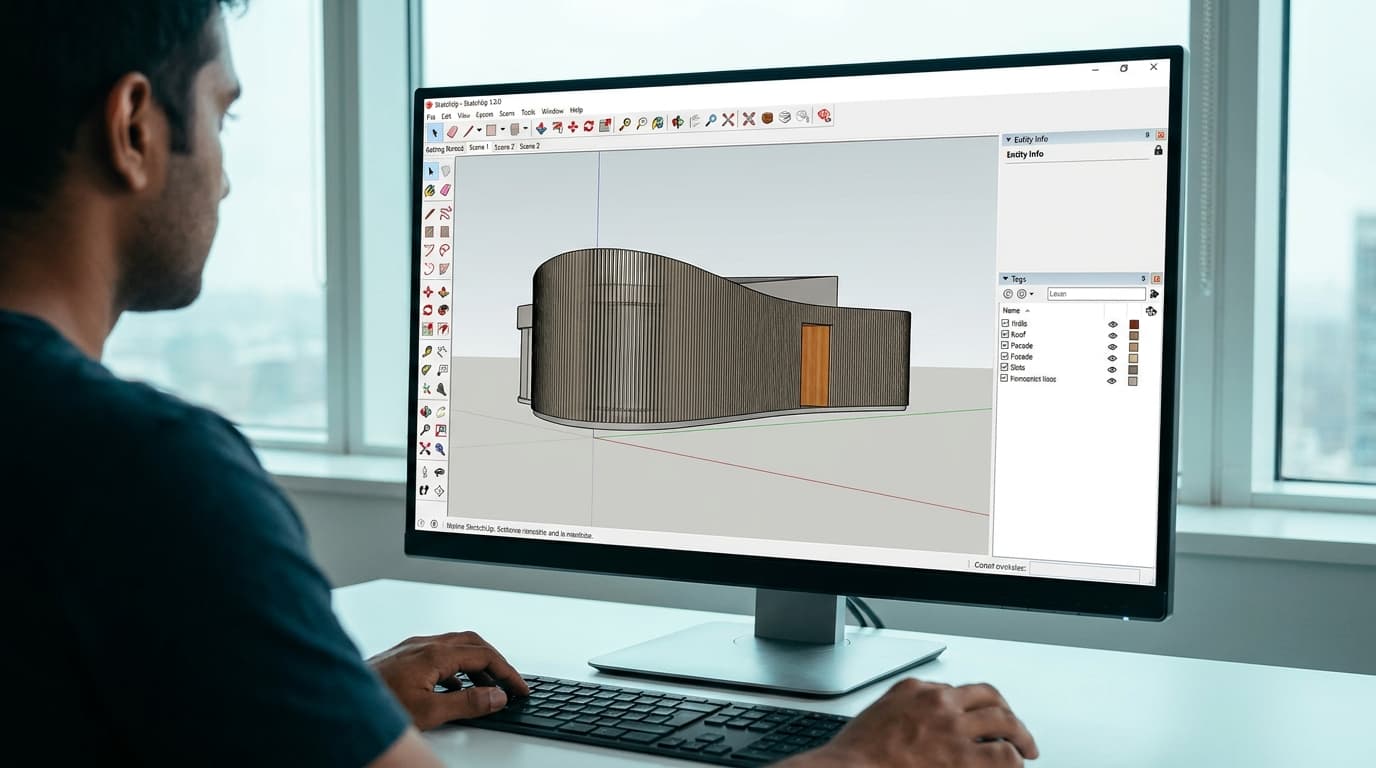
Stop arraying. The reason your fins drift out of alignment is that you're solving the wrong problem — you're treating a slatted facade as hundreds of objects that need to be placed correctly, when it is actually one object that needs to be cut correctly.
Build the curved mass first. Slice it. The gaps are a by-product of the cut, which means they cannot drift, because nothing was ever positioned by hand. That inversion is the first thing we teach in the Complex Geometry in SketchUp mini course, and it's the bit that every tutorial promising "perfect spacing in one click" skips straight past on its way to selling you an extension.
When you place fins along a curve, every fin carries its own position, its own rotation and its own chance of being 2mm out. Three hundred fins, three hundred opportunities for error, and no way to check them except by orbiting around and squinting. Even with a decent array plugin, you're trusting the plugin's interpretation of the curve rather than owning it.
When you slice a solid, there is one operation. One axis, one spacing value, one thickness value. If the spacing is wrong, you undo and change a number. If the curve is wrong, you fix the mass and slice again. The model has one place where the design lives, and that is the thing you want in a facade you'll be revising for six months.
The plugin we use for this in the course is Slicer. There are others that do comparable work, and I genuinely don't care which one you install — the technique is what transfers. What matters is the order of operations: form first, reveal second, slats last.
Carve the reveal into the mass before you cut a single slat
This is the part people get backwards, and it's the whole subject of lesson two, Slatted Facades with Deep Curved Reveals.
A slatted facade is rarely a constant-depth screen. The interesting ones step, swell, and get bitten into — a shallow run of fins that deepens where the facade wraps a stair core, or a scooped recess where it passes an entrance. If you array fins along a curve, every one of those moves is a fight. If you slice a mass, every one of those moves is modelled before the slats exist, in dumb push/pull geometry that takes four minutes.
So: block out the extents. Push and pull the steps. For the curved bite, build the cutting form separately — a sphere made from two circles on opposing axes with Follow Me is the quickest one in the box — then intersect it with the mass. Use Intersect With Model rather than Intersect Selection when you want the curvature to survive the operation, explode, and clean up.
One rule that will save you an hour: don't delete anything until the whole thing works. Keep the original block, keep the sphere, keep the profile arcs. Complex modelling in SketchUp is a sequence of operations that half-fail, and the piece of geometry you need to repair a botched intersect is almost always the one you just binned. We say this in two separate lessons because it bites twice.
Only when the mass is genuinely right do you slice it. In the lesson, the mass gets cut at around 500mm spacing with a 50mm slat thickness, then flattened to give clean faces — numbers you should treat as a starting point and immediately argue with, for reasons we'll get to.
The axis is the whole job
Here's what nobody tells you, and it's the thing that will actually wreck your facade.
Parallel-plane slicing gives you constant spacing measured in plan along the slicing direction — not constant spacing measured along the face of the curve. Where the facade runs square to the cut, the reveals are exactly what you specified. Where the facade swings away, the fins spread apart across the surface, and the gaps open up. Where the surface runs tangent to the cutting planes, the operation collapses entirely and you get slivers or nothing.
For a gentle bow — the Mercury Theatre sort of wave — the variation is small enough that nobody will ever measure it, and the fabrication benefit of every fin sharing an identical section is worth far more than theoretical gap consistency. For a facade that turns through ninety degrees or more, parallel slicing is the wrong tool and you need to either break the facade into segments with their own slicing axes, or accept a radial logic where fins run normal to the curve.
That's a design decision, not a software limitation, and it's worth stating in your drawings: fins set out at 500mm centres on plan grid reads very differently to a contractor than fins set out at 500mm centres on face. One is a gridline job. The other is a setting-out drawing with a radius on it.
Also: the axis letters in these tools don't always behave the way the model axes suggest, and in the lesson I work through that on camera rather than pretending it's obvious. If the first slice comes out running the wrong way, change the axis and go again — it costs you three seconds, not a rebuild. For lattice work you can slice on two axes at once, which is how lesson four builds a gridshell dome, but that's a different animal.
Reveal depth is a design decision, not a slider
Now the bit that actually matters more than any plugin.
How much of the building behind the screen you see is governed by one piece of trigonometry. A sightline passes between two fins as long as the angle of view stays inside arctan(gap ÷ depth), measured from perpendicular to the facade. Equal gap and depth, and your facade closes up at 45° off-square. Double the depth and keep the gap, and it closes at about 27°. Halve it, and the thing is still transparent at 63° — barely a screen at all.
This is why the facade that looked beautiful in your hero render looks like a solid wall in the street view, or vice versa. You weren't designing the reveal. You were accepting the plugin's default.
So work backwards. Decide where people stand, decide what they should see from there, and let that fix the depth-to-gap ratio before you type a number into the slicer.
Shallow (depth less than gap)
Balanced (depth ≈ gap)
Deep (depth 2×+ gap)
Closes at
Shallow (depth less than gap)~60°+ off-square — effectively never
Balanced (depth ≈ gap)~45°
Deep (depth 2×+ gap)~27° or tighter
Reads as
Shallow (depth less than gap)Texture on a surface
Balanced (depth ≈ gap)A screen that changes as you move
Deep (depth 2×+ gap)A solid wall from anywhere but head-on
In the render
Shallow (depth less than gap)Needs a strong sun angle or it disappears into the material; self-shadowing is minimal
Balanced (depth ≈ gap)Does the most work per fin — rich raking shadow, genuine depth
Deep (depth 2×+ gap)Beautiful raking light, but the facade behind it stops existing; model less of it
Fabrication, in practice
Shallow (depth less than gap)Light sections, simple carrier rail, usually a single fixing line
Balanced (depth ≈ gap)The point where you start needing back-fixing into a rail rather than face-fixing
Deep (depth 2×+ gap)Deeper sections mean more timber per metre, heavier assemblies, and on a curve, fins often machined from a wider blank — which is where the quote moves
The fabrication column is our read from project work rather than a published rate, so treat it as a direction of travel: as reveal depth increases on a curved facade, the fin stops being a stick and starts being a machined component. That's the conversation to have with the joiner early, because it's the one that changes the number.
And a curved deep-reveal facade has a second cost nobody models: if the fins are parallel-sided and the facade curves, each fin sits at a slightly different angle to the carrier. Either the carrier takes the angle, or the fin ends get cut to suit. Both are fine. Neither is free.
If you can't install extensions
Office IT, locked licence, exam conditions — it happens. The native route is Sandbox. Draw your guide curves as a series of arcs, select them, and build From Contours. You get a surface that follows the arcs, which you can then thicken and work with. It's lesson one of the course precisely because it proves the principle without a single external plugin: the guide geometry defines the form, and the form defines the slats.
It's slower and less adjustable than slicing. It still beats copy-paste.
Keeping the file alive afterwards
A long curved facade is a polygon farm. Three things keep it usable:
Cut your arcs down. SketchUp's arc segment count multiplies by every fin you generate. Thirty segments is a sensible working number for a form you're going to slice; two hundred is how you end up with a file that takes forty seconds to orbit and looks identical.
Group the output immediately after the slice operation and name it. Loose sliced geometry will weld itself to the next thing you draw near it.
Slice at coarse spacing first. Get the mass, the axis and the reveal right at 1000mm centres where everything redraws instantly, then undo and re-run at the real spacing once you've stopped changing your mind.
What to check, and what to draw
You don't need to audit a sliced array for drift — there's no drift to find, which is the point. What you do need to check is the places the operation went quiet: tangent zones with missing or paper-thin fins, ends that came out as slivers, and any area where the mass wasn't solid when you cut it. Run a section plane through the facade in plan and look along it. Anything wrong shows up as a rhythm break in about four seconds.
For the submission drawing, resist the urge to dimension three hundred fins. Give the setting-out curve with its radii, the spacing dimension and the plane it's measured in, the fin section, and the reveal depth at each zone. That's the information a contractor can build from, and it's also the information a tutor can see you've thought about — which is more than a facade texture has ever communicated to anyone.
The technique takes an afternoon to learn. The judgement about depth takes longer, and it's the one that shows.