Site analysis is where architecture begins. Not with a sketch, not with a concept, but with understanding. The best buildings don't fight their context—they respond to it, embrace it, and transform constraints into opportunities. Every design decision you make should be traceable back to something you discovered during site analysis. If it isn't, you're guessing.
Yet most guides on site analysis stop at data collection. They'll tell you to note the prevailing wind direction, but not what to do with that information. They'll remind you to photograph the views, but not how those views should shape your fenestration strategy.
This guide is different. We'll cover the complete site analysis process—from desktop research through to design synthesis—with a focus on the critical step most architects skip: translating observations into design decisions.
Site analysis is the systematic investigation of a site's physical, environmental, legal, and contextual characteristics before design begins. It examines everything from soil conditions to sun paths, from planning constraints to pedestrian desire lines.
But here's what matters: site analysis isn't a box-ticking exercise. It's the foundation of responsive design. Every observation you make should eventually connect to a design decision through a simple framework:
We'll return to this framework throughout the guide. It's the difference between a site analysis that sits in a drawer and one that genuinely shapes your architecture.
Why Site Analysis Determines Project Success
A thorough site analysis delivers three critical outcomes:
Risk Mitigation: Discovering a high water table, restrictive covenant, or protected species after you've developed a scheme is expensive. Site analysis surfaces these issues early, when changing direction costs nothing.
Design Ammunition: Every constraint is a potential generator. A site exposed to prevailing winds isn't a problem—it's an opportunity for natural ventilation, shelter strategies, and considered entrance positioning. But only if you've analysed it properly.
Planning Success: Local planning authorities expect demonstrated site responsiveness. A Design and Access Statement that shows clear connections between site conditions and design decisions is far more likely to succeed than one presenting a generic scheme.
The Three-Phase Process
Site analysis follows a clear sequence: desktop research, site visit, then synthesis. Rushing to site without preparation wastes time. Skipping synthesis leaves valuable insights buried in your notes.
Phase 1: Desktop Research
Before visiting, gather everything available about the site and its context. This preparation means you'll arrive with specific questions rather than a vague brief to "look around."
Planning Portal: Previous applications, decisions, officer reports, constraints maps and policy designations for your site.
Land Registry: Title plans, restrictive covenants, easements, rights of way and ownership boundaries.
OS Maps: Current and historical mapping, spot heights, boundary definitions and contextual information.
Flood Map for Planning: Flood zones, surface water risk, historic flooding events and drainage considerations.
MAGIC Map: Ecological designations, ancient woodland, priority habitats and environmental constraints.
Google Earth Pro: Historical imagery showing how the site has changed over decades, plus terrain analysis.
Local Plan: Site allocation, policy designations, design guidance and development plan documents.
Conservation Area Appraisals: If applicable, essential reading for understanding local character and significance.
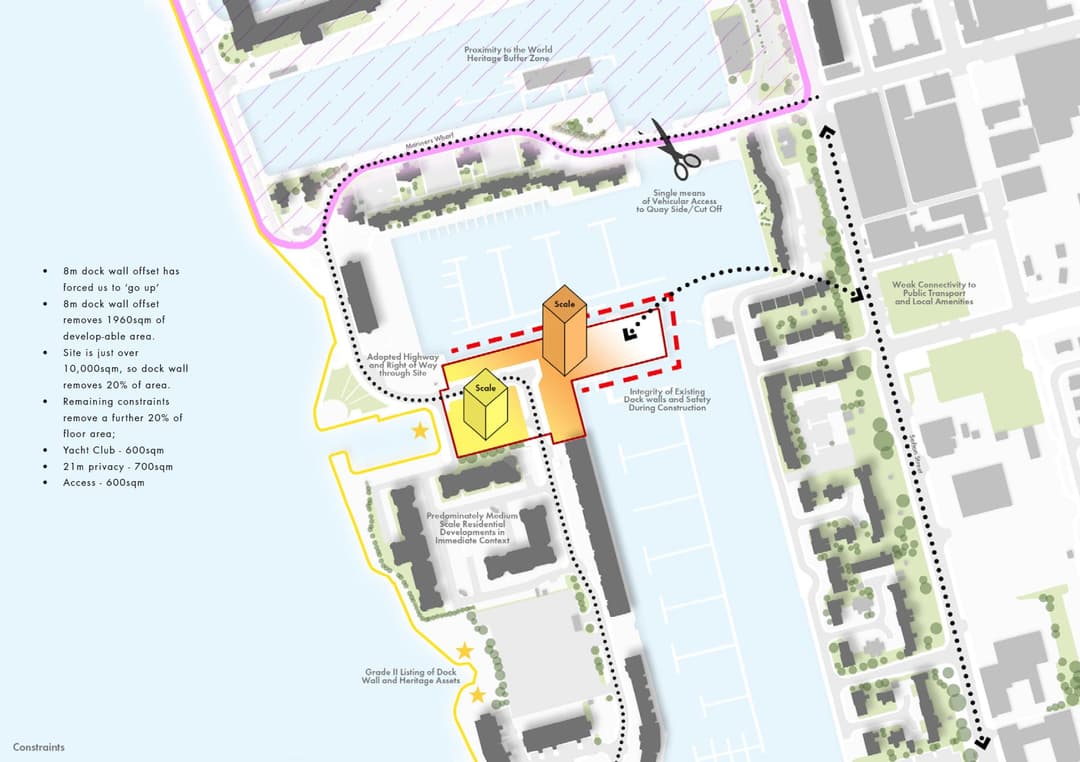
Pro tip: Create a site constraints drawing at this stage, overlaying everything you've found onto a base plan. This becomes your first analytical output and guides your site visit.
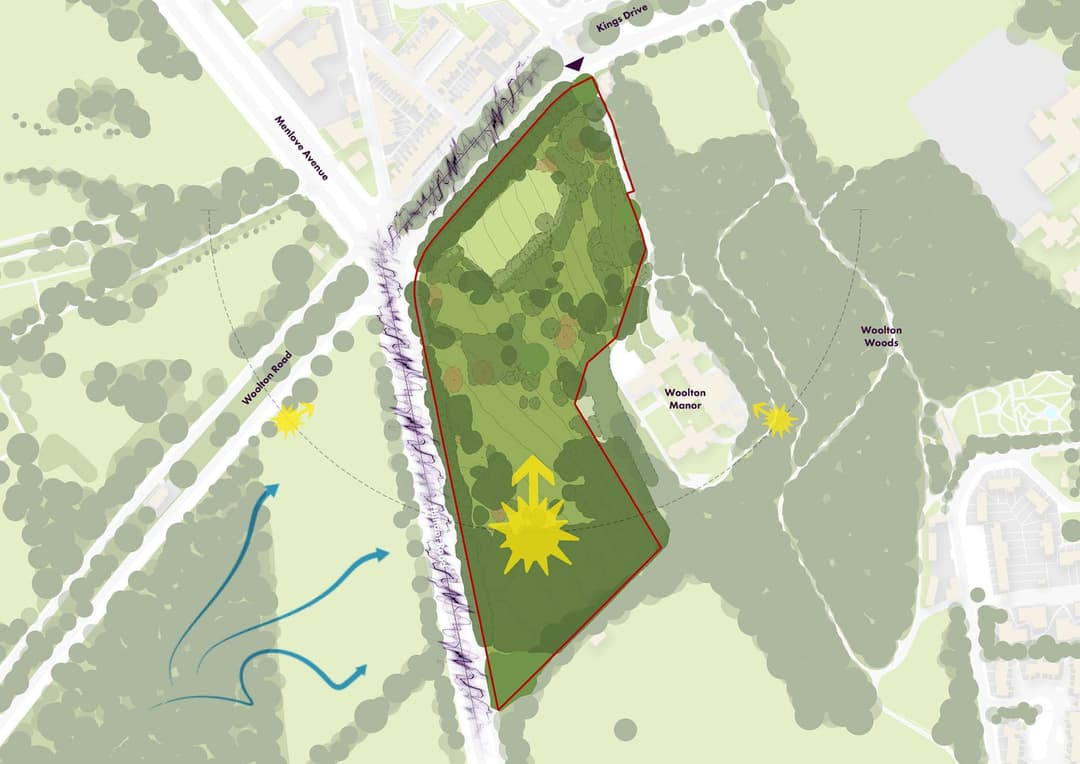
Example site constraints diagram
Phase 2: The Site Visit
Desktop research tells you what's documented. The site visit reveals what's actually there—and more importantly, what it feels like.
Camera: Phone is fine, but bring a backup battery. You'll take more photos than you expect.
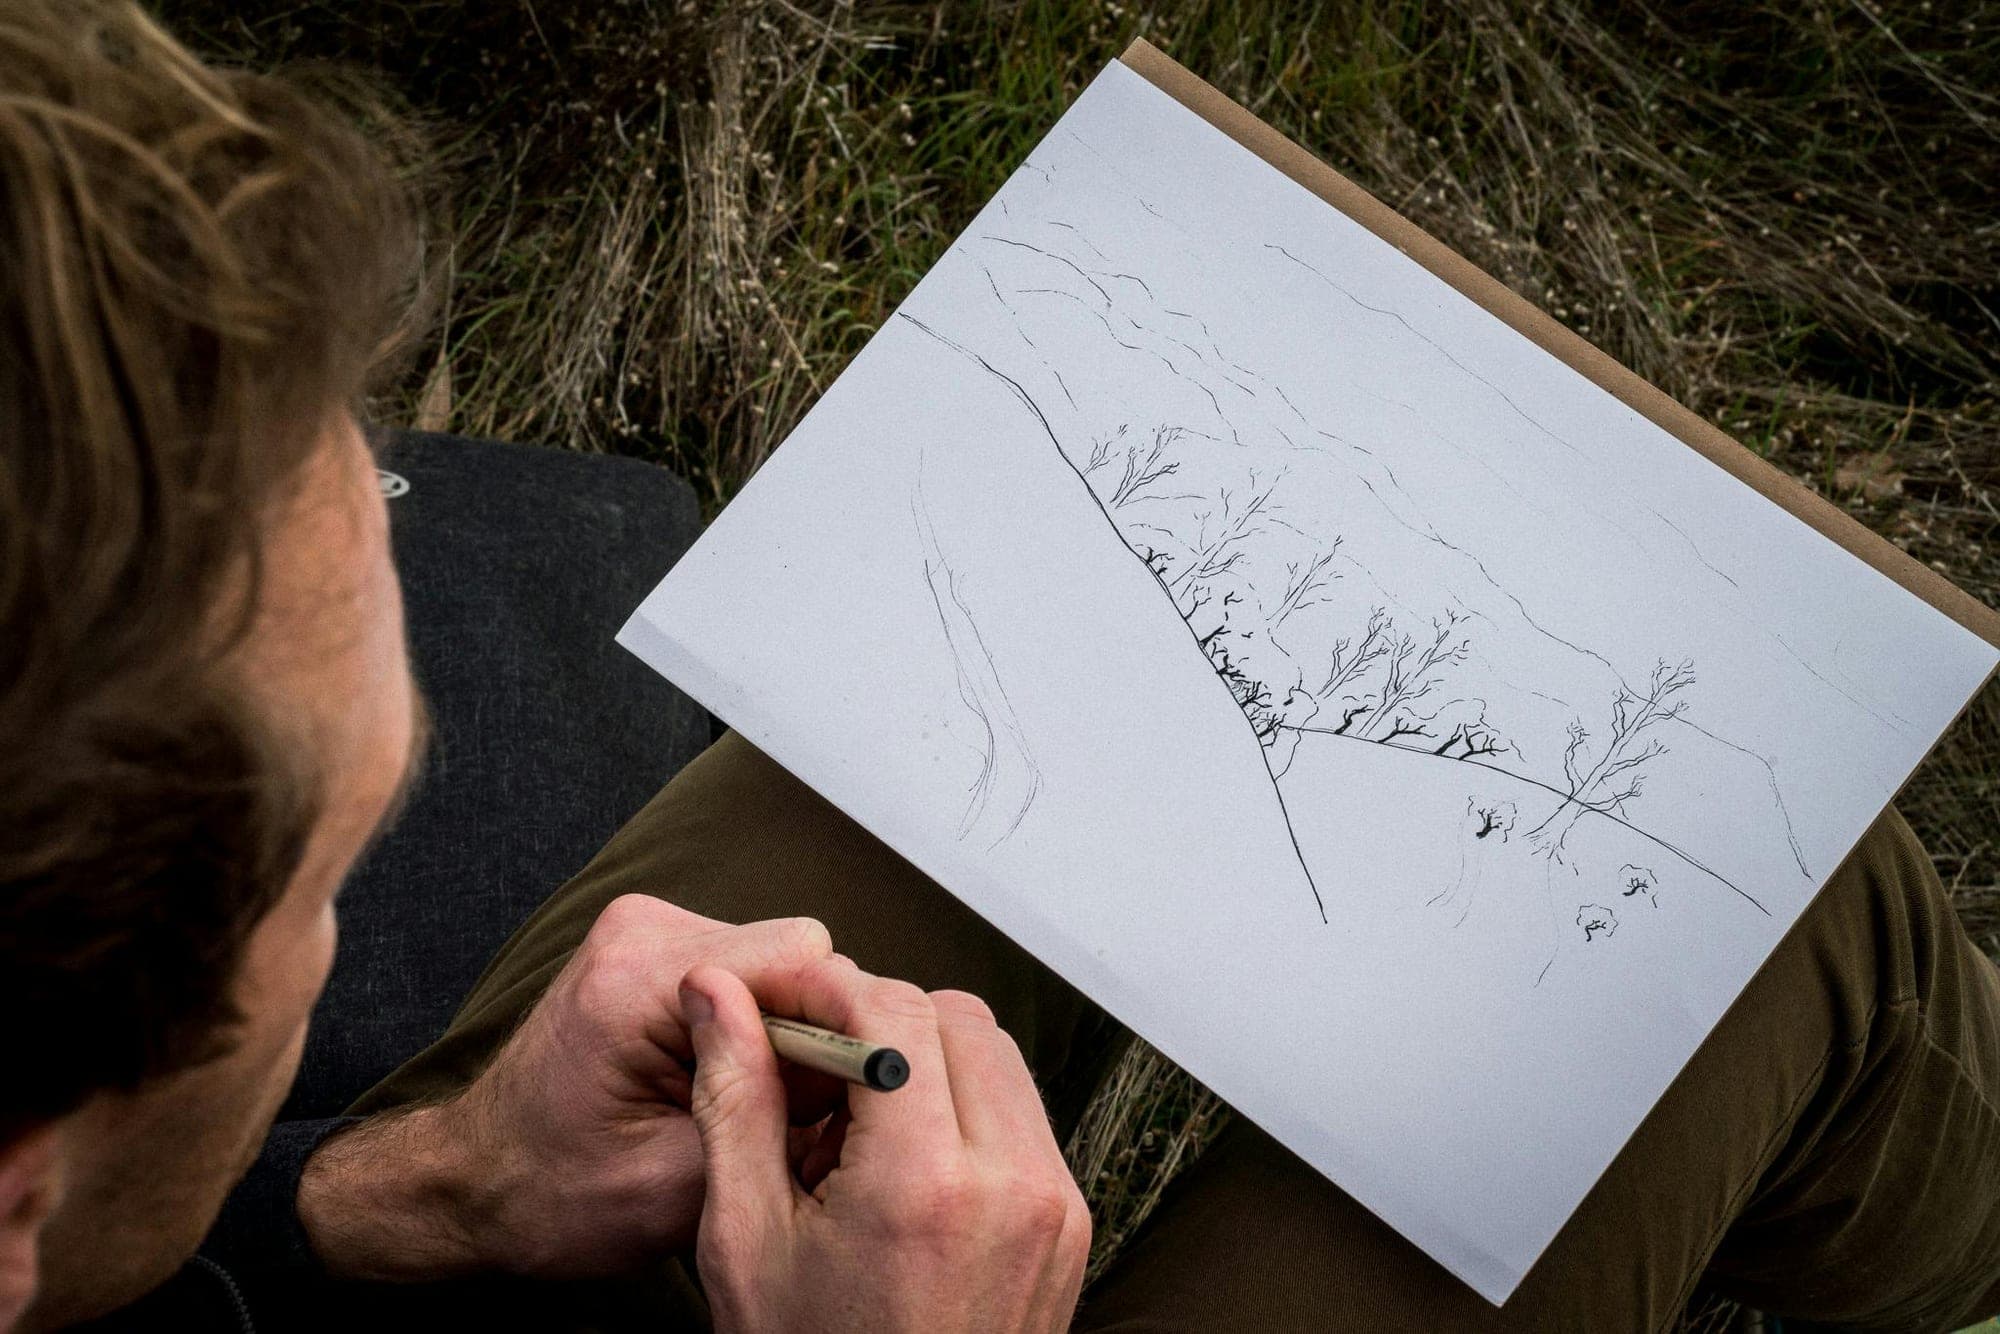
Notebook and Pen: Faster than typing for quick observations and sketch diagrams.
Compass or Compass App: Essential for understanding orientation and confirming north point.
Laser Measure: For verifying dimensions and checking clearances on site.
High-Vis Vest: If near roads or on construction sites, safety first.
The Constraints Plan: Bring what you prepared during desktop research to verify and annotate.
Don't just photograph the site—photograph FROM the site. Capture views out in all directions. These images become essential for understanding orientation, overlooking, and visual connections.
Walk the boundaries. Note where they're clearly defined and where they're ambiguous. Check for evidence of informal access or use that might indicate prescriptive rights.
Visit at different times if possible. A site that feels calm at 10am might be gridlocked at 5pm. Morning sun and afternoon sun reveal different qualities entirely.
The Intangibles: Beyond the measurable, pay attention to atmosphere. Where do you instinctively want to stand? What draws your eye? Where feels exposed, and where feels sheltered? These subjective observations often point toward the most important design moves.
Phase 3: Synthesis
This is where most site analyses fail. You've gathered the data—now what?
Synthesis means reviewing every observation and asking: "What does this mean for the design?" Not every finding will be significant, but the critical ones need to be identified and carried forward.
We recommend creating a summary document with three columns: Observation, Implication, and Design Response. This format forces the connection between analysis and design. It's also invaluable for Design and Access Statements, where demonstrating site responsiveness is essential.
The 12 Key Analysis Areas
Every site is different, but these twelve areas provide a comprehensive framework. Not all will be equally relevant to every project—a city centre infill has different priorities to a rural new-build—but each should be consciously considered.
1. Location and Context
Understand the site's position within its broader context. What's the character of the area? Is it urban, suburban, or rural? What's the prevailing density, scale, and architectural language?
Map the key destinations: transport links, schools, shops, healthcare, employment. These influence not just planning viability but practical decisions about parking provision, cycle storage, and access design.
2. Legal and Planning Constraints
This is non-negotiable groundwork that must be understood before design begins:
Planning Status: What's the site allocated for? Any relevant planning history or extant permissions?
Conservation: Is the site within a Conservation Area? Near listed buildings that affect setting?
Trees: Any TPOs? Even without formal protection, significant trees may be material to planning decisions.
Rights: Easements, covenants, rights of way, rights of light affecting development potential.
Ownership: Any ransom strips or unclear boundaries that could complicate development?
3. Topography and Levels
Changes in level create both opportunities and challenges for architectural design:
Challenges: Accessibility requirements, retaining structures, construction costs, drainage complexity.
Obtain or commission a topographical survey for anything beyond the simplest sites. Spot heights from OS mapping aren't sufficient for design development.
4. Ground Conditions
Soil type affects foundations, drainage, and landscape design. For significant projects, a geotechnical survey is essential. For smaller works, the BGS Geology Viewer provides indicative information.
Gas and Telecoms: Availability, connection points, fibre availability for modern requirements.
Request C3 enquiries from utility providers early. Capacity constraints or distant connection points can fundamentally affect project viability.
7. Neighbouring Properties
Your site doesn't exist in isolation. Neighbours affect your design and your design affects them:
Overlooking: Existing windows, private gardens, habitable room positions to consider.
Daylight and Sunlight: Will your proposal affect neighbours' light? BRE guidelines may apply.
Boundary Treatments: Who owns what? Party wall implications for construction?
Character: Scale, materials, architectural features of adjacent buildings to respond to.
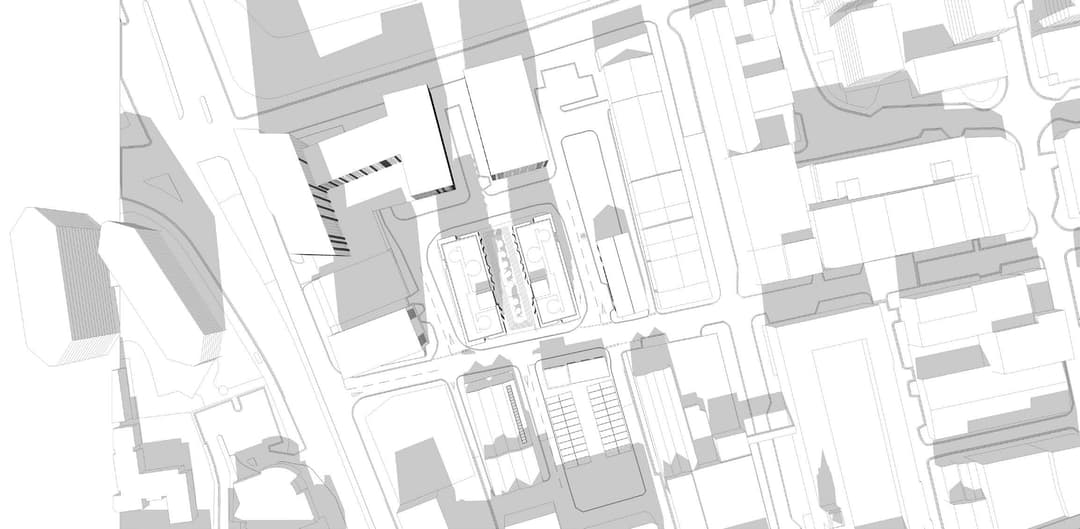
Example over-shadowing diagram
8. Views and Visual Impact
Views work both ways and require careful analysis:
Views From the Site: What can you see? What's worth capturing or framing? What should be screened?
Views To the Site: How will your building be seen? Key viewpoints for visual impact assessment?
Landmarks: Any features that should inform orientation, alignment, or design response?
Photograph key views and consider how they might be incorporated into the design—or how negative views might be mitigated through careful positioning and screening.
9. Noise and Pollution
Environmental quality affects both design decisions and future occupant amenity:
Traffic Noise: Measure or estimate if near busy roads. May require acoustic assessment for planning.
Commercial or Industrial: Any neighbouring uses that generate noise or disturbance?
Air Quality: Air Quality Management Areas, proximity to pollution sources.
Light Pollution: For rural sites, dark sky considerations may be relevant.
Acoustic assessment may be required for planning. Even where not mandatory, understanding the noise environment informs facade design, room layouts, and ventilation strategy.
10. Ecology and Biodiversity
Biodiversity net gain is now mandatory in England. Understanding existing ecological value is essential:
Habitats: Woodland, hedgerows, grassland, water features requiring assessment.
Protected Species: Bats, great crested newts, badgers, nesting birds may trigger surveys.
Designations: SSSI, Local Wildlife Sites, priority habitats affecting development.
Opportunities: Green roofs, wildlife corridors, habitat creation for net gain.
Preliminary ecological appraisal (PEA) is typically required for anything beyond minor householder development.
11. Heritage and Character
Even outside Conservation Areas, understanding local character is essential for planning success:
Architectural Character: Prevailing styles, materials palette, typical details and proportions.
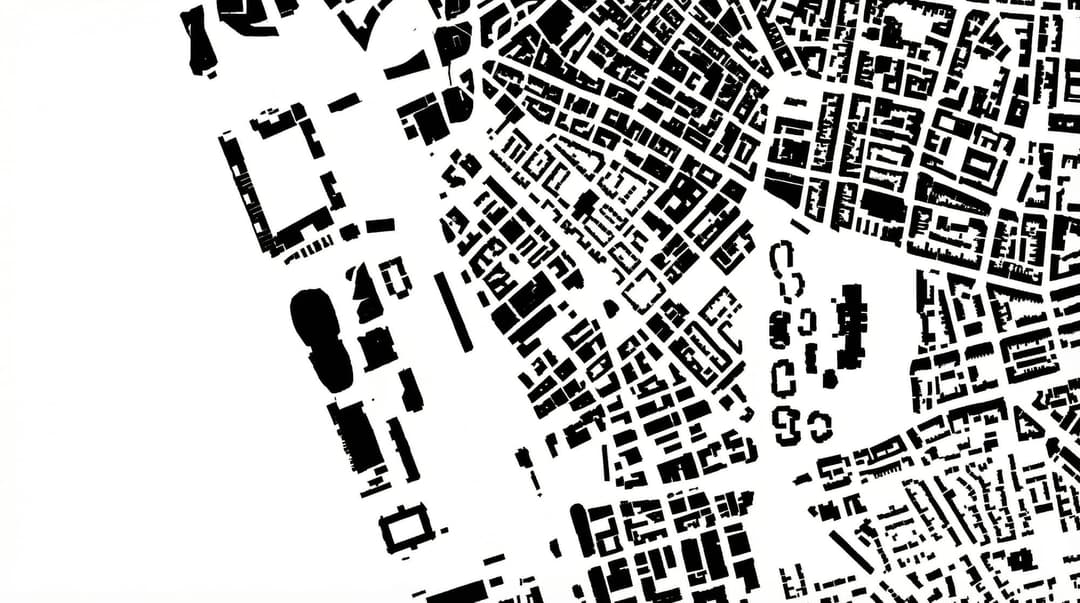
Urban Grain: Plot widths, building lines, density patterns, spatial relationships.
Historical Development: How has the area evolved? What patterns are significant?
Significance: Any heritage assets, designated or otherwise, affecting design response?
Example figure ground diagram
12. Climate and Microclimate
This is where most site analyses are weakest—and where the greatest design value often lies. Climate analysis deserves detailed attention.
Climate and Microclimate: The Missing Analysis
Generic guides tell you to "consider sun path and prevailing wind." That's not analysis—it's a reminder. Proper climate analysis means understanding specific conditions and their design implications.
Solar Analysis
The sun's path varies dramatically through the year. In the UK:
Midsummer: Sun rises NE, sets NW, reaches approximately 60° altitude at solar noon.
Midwinter: Sun rises SE, sets SW, reaches only approximately 15° altitude at solar noon.
Equinox: Sun rises due E, sets due W, approximately 40° altitude at solar noon.
South-facing glazing receives maximum solar gain in winter when the sun is low, and can be shaded in summer with horizontal overhangs. East-facing rooms get morning sun, ideal for bedrooms and kitchens. West-facing glazing is hardest to shade and causes afternoon overheating. North-facing glazing provides consistent, diffuse daylight with minimal heat gain.
THEREFORE: Orient the building to maximise south-facing principal rooms. Design appropriate shading (brise-soleil, deep reveals, overhangs) scaled to solar angles. Consider carefully before placing large glazing on west elevations without effective shading.
Wind Analysis
The UK's prevailing wind is from the southwest, but local conditions vary significantly. Coastal sites, hilltops, and urban canyons all create distinct wind patterns.
Prevailing Direction: Where does wind typically come from? This determines weather exposure.
Average Speed: Gentle breeze or significant exposure? Affects comfort and heat loss.
Gust Speeds: Maximum recorded for structural design and cladding specification.
Seasonal Variation: Does the pattern change significantly through the year?
Wind affects comfort, weathering, ventilation, and energy performance. Outdoor spaces on the windward side will be unpleasant. Driving rain comes from the prevailing wind direction. Cross-ventilation needs openings on windward and leeward faces. Exposed elevations lose more heat through infiltration.
THEREFORE: Position entrances and outdoor amenity on the leeward (sheltered) side. Use the building mass as a windbreak to create shelter. Design robust weathering details on the windward elevation. Plan cross-ventilation with the wind direction in mind.
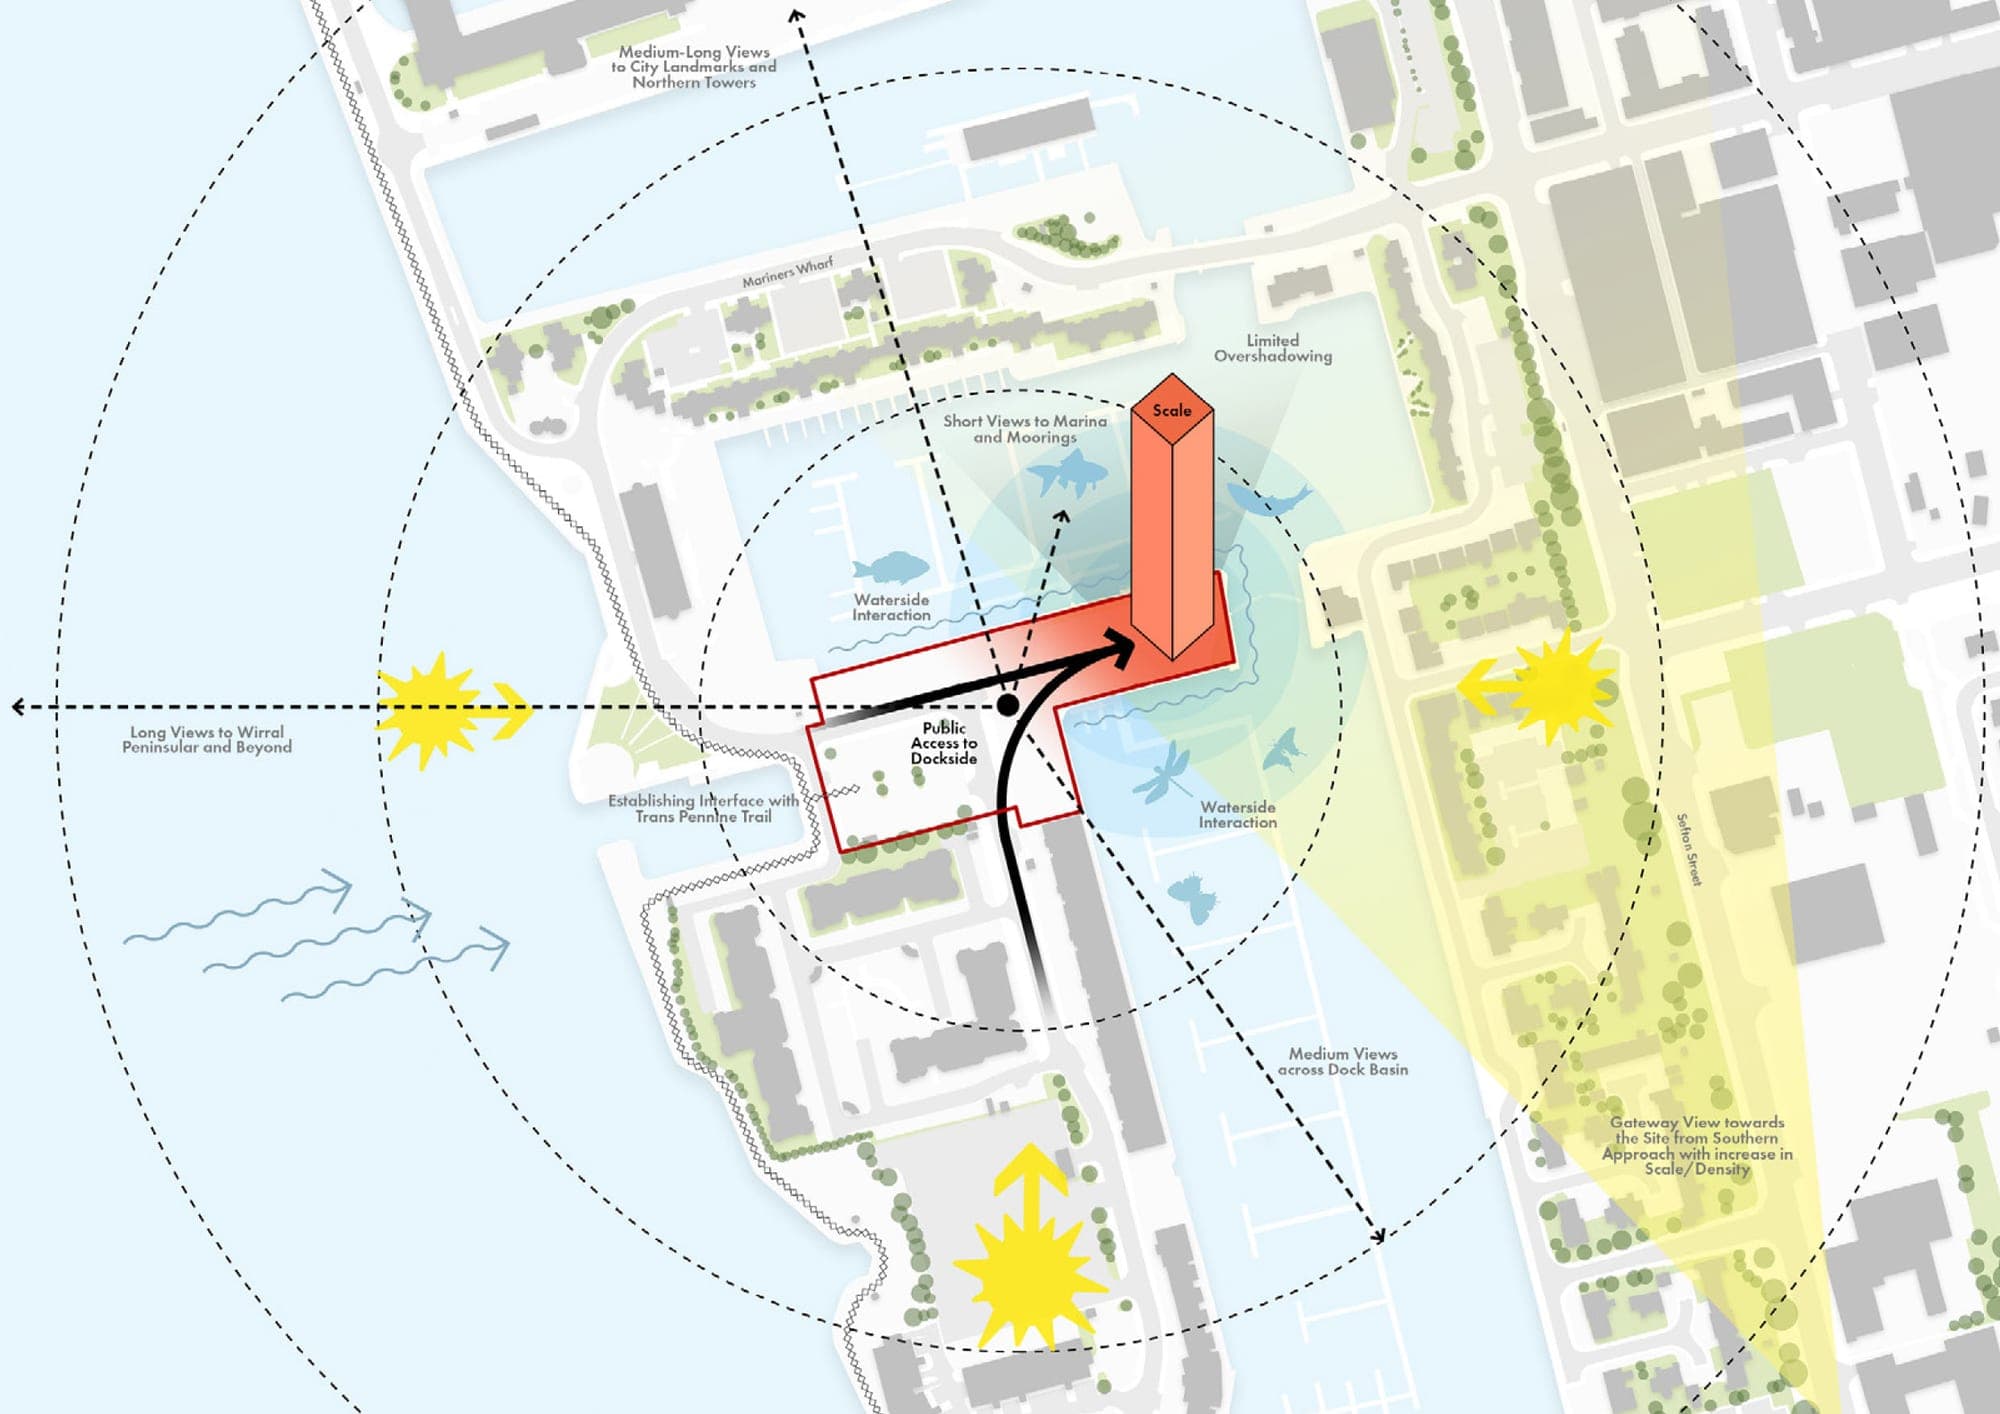
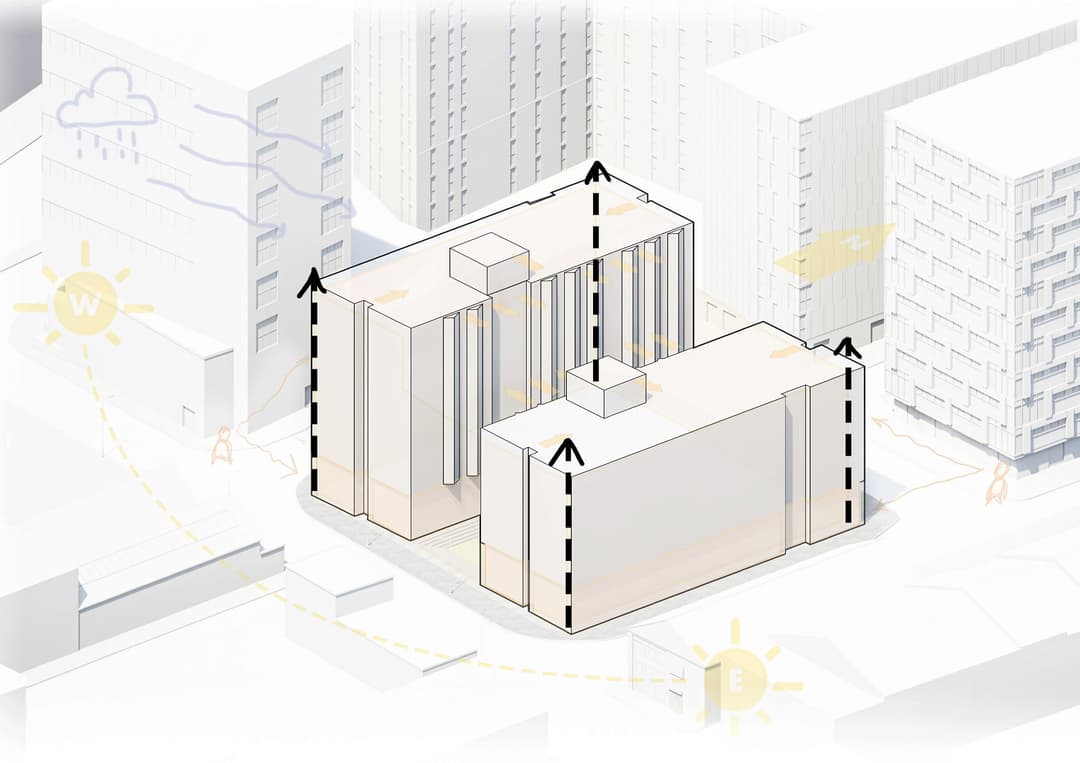
Example climate analysis diagram
Temperature and Thermal Range
Understanding temperature patterns informs thermal strategy for the building:
Average Temperatures: Monthly and seasonal ranges for heating and cooling design.
Diurnal Swing: Difference between day and night temperatures affects thermal mass strategy.
Frost Days: How many days below 0°C annually? Affects detailing and services.
Extreme Temperatures: Record highs and lows for resilient design.
High diurnal range (greater than 10°C) favours thermal mass strategies—exposed concrete or masonry can absorb daytime heat and release it at night. Many frost days means careful detailing at thresholds, frost-protected foundations, and trace heating for external pipes. Extreme heat events are becoming more common—overheating analysis is now essential.
THEREFORE: For sites with high diurnal range, expose thermal mass internally. Design for frost protection in threshold details. Include overheating mitigation (shading, ventilation, thermal mass) as standard practice.
Precipitation and Humidity
Rainfall patterns affect everything from roof design to landscape strategy:
Annual Rainfall: Total mm and regional comparison for drainage design.
Rainy Days Per Month: Frequency matters as much as total volume for amenity.
Seasonal Distribution: When is it wettest? Affects construction and landscape establishment.
Humidity Levels: Condensation risk assessment, material selection implications.
High rainfall demands generous gutters, careful threshold detailing, and covered entrances. Frequent rain makes rainwater harvesting viable for WC flushing and irrigation. High humidity increases condensation risk—careful cold bridge detailing and vapour control essential.
THEREFORE: Size rainwater goods generously (50% larger than calculated minimum). Provide covered entrance zones. Consider rainwater harvesting for WC flushing and irrigation. Detail carefully for condensation control, especially at thermal bridges.
Bringing Climate Analysis Together
Climate analysis shouldn't exist in isolation. The power comes from overlaying multiple factors and understanding their interactions:
The prevailing wind is from the SW, but the best views are also to the SW. Solar gain potential is good, but the site is exposed and wind chill reduces effective temperature. Rainfall is high, but infiltration is limited by clay soils.
These tensions are where design skill comes in. Site analysis identifies them; design resolves them creatively.
From Observation to Design Decision: The THEREFORE Methodology
Here's the framework that transforms site analysis from academic exercise to design tool:
1. OBSERVATION: What did you find? Factual, measured, documented.
2. IMPLICATION: What does this mean? For comfort, buildability, planning, sustainability.
3. THEREFORE: What should you do about it? Specific design response.
Example Application: Topography
Observation: Site slopes 1:8 from north to south, with a 4m fall across the plot.
Implication: Level access from the street (north) will require either significant cut/fill or split-level design. Southern portion of the site has potential for daylight to lower levels. Retaining structures likely required.
THEREFORE: Design a split-level arrangement stepping down with the site. Utilise the level change to create a lower ground floor with south-facing glazing to garden. Minimise cut/fill to reduce costs and material export.
Example Application: Overlooking
Observation: The neighbouring property to the east has habitable room windows at first floor overlooking the site, at 8m from the shared boundary.
Implication: Any first floor windows or outdoor space on the eastern boundary will create mutual overlooking. Privacy distances typically require 21m back-to-back or 12m to a boundary for habitable rooms.
THEREFORE: Position non-habitable rooms (bathrooms, stairs, storage) on the eastern elevation at first floor. Use obscured glazing or high-level windows where habitable rooms must face east. Focus private outdoor amenity toward the western side of the plot.
Example Application: Wind Exposure
Observation: Prevailing wind from the southwest at 18km/h average, with gusts recorded to 65km/h. Site exposure level assessed as Moderate-High.
Implication: The southwest elevation will experience maximum weather exposure and driving rain. Outdoor spaces on this side will be uncomfortable. Heat loss through infiltration and fabric will be elevated on this elevation.
THEREFORE: Position main entrance on northeast (leeward) elevation with covered porch. Locate terrace and garden amenity on northeast side, using building mass as windbreak. Specify robust, weather-resistant materials and detailing on southwest elevation. Consider enhanced air-tightness measures on windward side.
Example synthesis diagram
Presenting Your Site Analysis
Site analysis serves two audiences: yourself (guiding design) and others (planning officers, clients, consultants). Presentation matters for both.
For Design Development
Keep your working analysis loose and iterative. Sketches, annotated photos, and rough diagrams are fine—clarity matters more than polish at this stage.
Create a summary sheet of key constraints and opportunities. Pin it above your desk. Every design decision should be checkable against it throughout the project.
For Planning Submissions
Design and Access Statements require demonstrated site responsiveness. Structure your analysis clearly with four sections: Context (location, character, planning status), Constraints (what limits or directs the design), Opportunities (what the site offers), and Response (how the design addresses both).
Use annotated diagrams rather than pages of text. Planning officers review dozens of applications—make yours easy to assess quickly.
For Clients
Clients rarely need the full technical analysis, but they benefit from understanding why you're making certain recommendations.
Focus on the design implications: "The prevailing wind means we're recommending the terrace on this side of the house, where it'll be sheltered and comfortable." Connect analysis to outcomes they care about.
Modern Tools for Site Analysis
Site analysis has traditionally been a manual process—maps, site visits, hand-drawn diagrams. That's still valuable, but modern tools can dramatically accelerate and enhance the process.
Mapping and Data Sources
Digimap: Comprehensive OS mapping for educational and professional use.
MAGIC Map: Environmental designations and ecological constraints mapping.
Flood Map for Planning: Definitive flood risk data from the Environment Agency.
Google Earth Pro: Historical imagery, terrain analysis, basic measurement tools.
Climate Data Challenge
Accessing reliable climate data has historically been difficult. Met Office data is expensive; weather stations are sparse. Most architects either guess or use generic regional assumptions that don't reflect site-specific conditions.
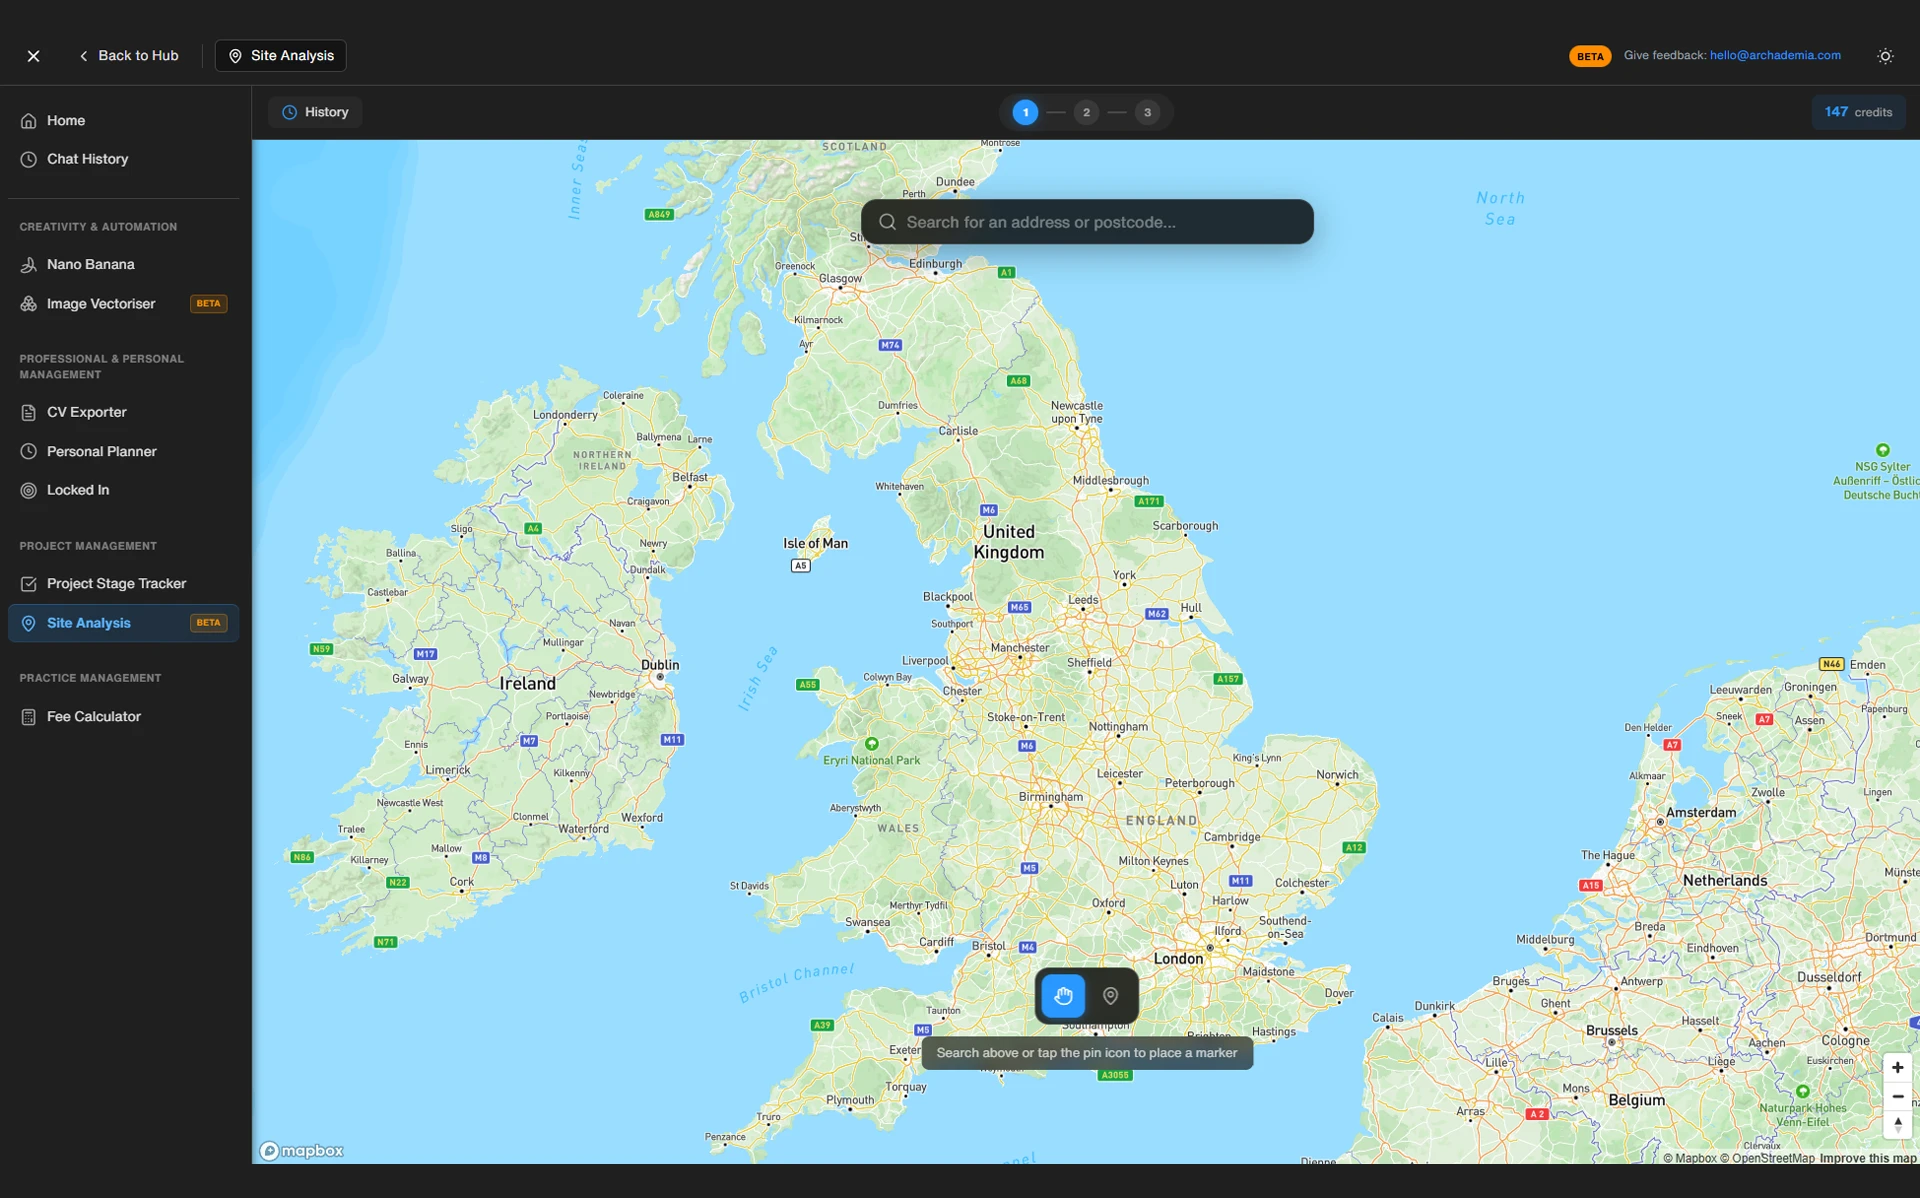
This is why we built our AI-powered Site Analysis Tool within ArchAdemia.
Upload your site location and aerial image, and our tool delivers 12-month historical climate data for your exact coordinates, wind rose analysis showing directional frequency (not just prevailing direction), solar exposure metrics calibrated to your latitude, temperature and rainfall patterns with seasonal breakdown, design implications automatically generated with THEREFORE recommendations, and an annotated site diagram with climate overlays generated by AI.
What used to take hours of research and manual diagram creation now takes minutes—with more accurate, site-specific data than most architects have ever had access to.
Conclusion: Analysis as Design Generator
Site analysis isn't preliminary work to get through before the "real" design begins. It IS the beginning of design. Every observation is a potential generator; every constraint is an opportunity in disguise.
The best architects don't see site analysis as a chore—they see it as the treasure hunt where the clues to a successful project are hidden.
Do it thoroughly. Do it systematically. And most importantly, follow every observation through to its design implication. That's where site analysis transforms from academic exercise to competitive advantage.
Ready to transform your site analysis process? The ArchAdemia Site Analysis Tool combines AI-powered climate data, automated diagram generation, and design implication synthesis—giving you deeper insights in a fraction of the time.