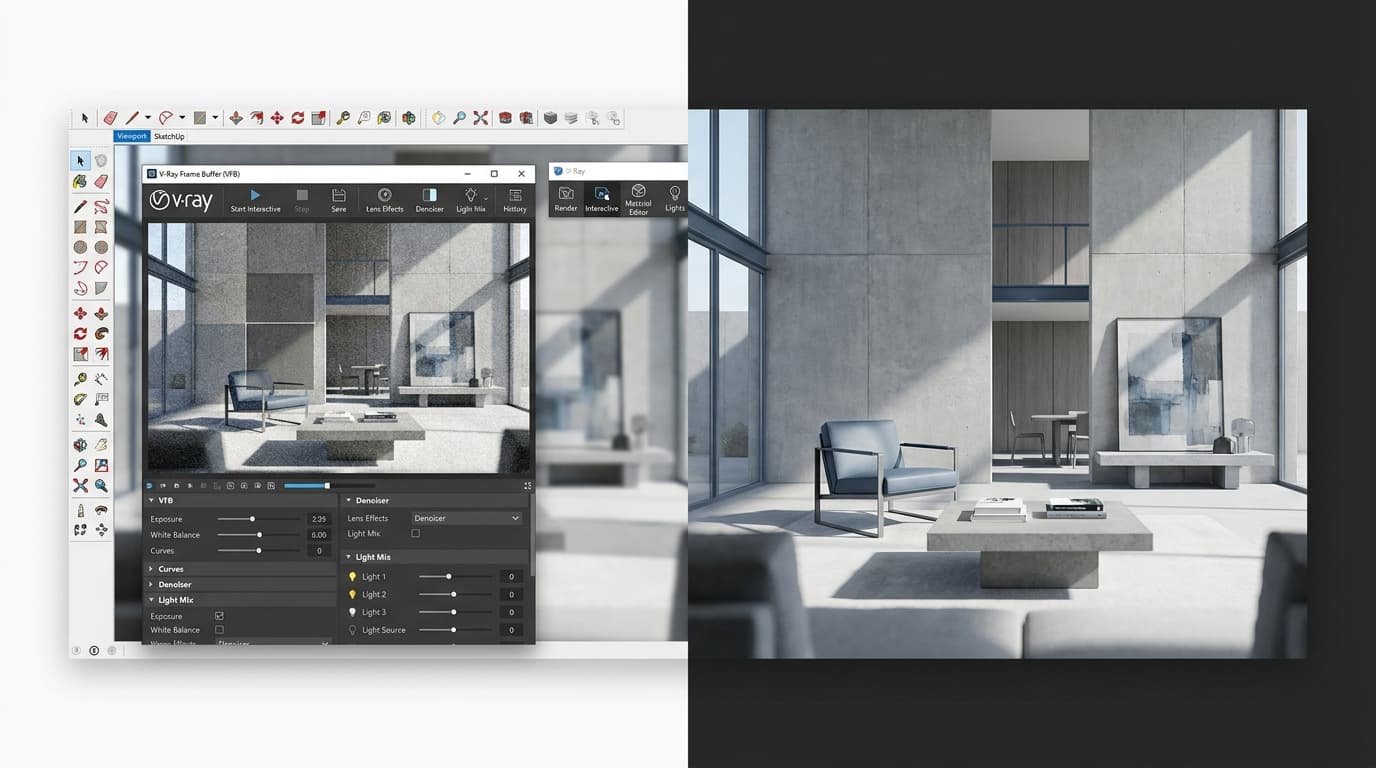
You don't rebuild. That's the short answer, and it should be the end of the anxiety: the geometry, the cameras, the saved views and even the Enscape assets you scattered around the scene come across into V-Ray. What you rebuild is narrower and more specific — material definitions, light intensities, and the sky-to-exposure relationship that made the Enscape image look right in the first place.
So it's a materials job, a lighting job, and a nerve job. Not a modelling job.
The nerve part matters more than people admit, because the first thing that happens when you convert a material is that the picture gets worse. Your carefully tuned Enscape brick becomes a flat grey default. Your glass loses the blue. If you don't know that's coming, you assume you've broken something and go back. Knowing the order of operations is most of the skill here.
Before you touch a single material, duplicate the file. Suffix it _VRAY and never open the original again for this exercise — you still need the Enscape version alive for the client walkthrough on Thursday, and once you start flipping material types you'll understand why.
Then switch the renderer over and render the scene completely unchanged. In Rhino that's the render tab, current renderer set to V-Ray; Revit and SketchUp put the same switch in their own render settings. Frame your hero camera, set a modest resolution, and let it go.
This feels like a waste of twenty minutes. It isn't. It's the single most useful image in the whole process, because it tells you the actual size of the gap for your shot rather than the gap in somebody's YouTube thumbnail. When we set this up for the Enscape to V-Ray Workflow course, V-Ray read the Enscape scene straight out of the box — furniture, people, foliage, all the little decor elements — and rendered them without complaint. The baseline is already a competent image. Everything you do from here is a decision about whether the improvement is worth the hours.
Some Images Don't Get Better in V-Ray. They Get Later.
This is half the reader's question and nobody answers it, so here it is up front.
The engine gap shows up in specific optical situations. Where those situations aren't in your frame, you're paying in hours for something a judge cannot see at 2,000 pixels wide.
Your hero shot
What V-Ray actually adds
Worth the pass?
Your hero shotDaylight exterior, mid-distance, sky-heavy, matte facade
What V-Ray actually addsMarginal. Sharper foliage silhouettes at close range
Worth the pass?No — grade the Enscape output instead
Your hero shotDusk or night interior with multiple artificial sources
What V-Ray actually addsLight that bounces properly, believable falloff, reflections that carry the fittings
Worth the pass?Yes, this is the big one
Your hero shotGlazing-heavy elevation with layered reflection
What V-Ray actually addsReal refraction through multiple surfaces, no mirror cheats
Worth the pass?Yes
Your hero shotPolished metal, mirror, water with anything behind it
What V-Ray actually addsCorrect behaviour rather than an approximation
Worth the pass?Yes
Your hero shotDetail shot — a joint, a texture, a material study
What V-Ray actually addsDisplacement and coat layers that carry at close range
Worth the pass?Yes
Your hero shotLarge-format print submission
What V-Ray actually addsClean resolution at scale, and usable render channels
Worth the pass?Usually yes
Your hero shotAerial or masterplan view
What V-Ray actually addsAlmost nothing a viewer can name
Worth the pass?No
Read that table against your actual frame, not against your ambition. A daylight street view of a brick house with a good sky and a decent bit of grading is, in my experience, not reliably distinguishable from a V-Ray version of the same camera — and if you're picking a real-time tool to build those scenes in, we've argued that comparison out properly in our Enscape vs Lumion vs Twinmotion piece.
The dusk interior is the opposite case. That's where Enscape is doing the most guessing and V-Ray is doing the most maths, and it's exactly why the course scene we teach is an evening kitchen rather than another sunny exterior.
What Survives the Jump
Geometry. All of it. There's no export, no FBX, no re-linking. Both engines read the same host model, which is the whole point of the Bridge.
Cameras and saved views. Your composition survives, which is more valuable than it sounds — the framing is usually the part you laboured over hardest and the part V-Ray can't improve.
Enscape and Cosmos assets. The furniture, the people, the trees, the decor. In our own testing they render out of V-Ray without intervention. The framing we use in the course is that Cosmos carries the same assets at a higher polygon count, and that shows up where you'd expect: foliage that read as soft mush at close range in Enscape starts to hold individual leaf silhouettes.
The sky. V-Ray has the same procedural cloud system, so the sky you spent forty minutes nudging into something dramatic is not lost. In our experience it carries across, which spares you the worst busywork in the whole migration.
Materials, as a starting point. They transfer with their textures and rough values intact. Not finished — but not from zero either.
One thing to hold onto: the Bridge runs one direction. V-Ray reads the Enscape scene; Enscape does not read your V-Ray work back. We've tested it in both directions and that's simply how it behaves, which is the actual reason for the duplicate file. There's no undoing your way home.
What You Rebuild, In This Order
Materials — but only some of them
In Rhino, material type is a single dropdown in the materials panel. The same dropdown that put a material into the Enscape material editor is the one that puts it into the V-Ray asset editor — and from what we see doing it live in the course, it's one or the other. Flip the brick to V-Ray type and it leaves the Enscape editor and appears in V-Ray's, brightened up and waiting, suddenly carrying reflection layers, refraction, coats, sheen and displacement that Enscape never offered you.
Which is exciting for about ninety seconds and then becomes a very large amount of clicking.
So don't convert everything. Convert on two tests:
Does it dominate the pixels? The facade, the floor, the worktop, the ceiling plane. Anything filling a quarter of the frame earns a proper V-Ray material.
Is it optically active? Glass, water, polished metal, mirror, gloss lacquer, anything that refracts, or reflects something identifiable. This is where the engine gap actually lives.
Everything else — the grey context blocks, the skirting, the back of a cupboard, the neighbour's roof — stays as it is. It renders fine. In practice that cuts a two-day materials job down to an afternoon of about eight materials that matter.
Lights — rebalance the set, don't convert the numbers
Enscape's light values and V-Ray's are not on the same scale. That's what we've found every single time we've moved a scene over, so treat the intensity figures as arbitrary and stop trying to convert them.
The method that works: kill all the artificial lights, get the ambient and sky exposure looking correct on its own, then bring the artificial sources back in groups. Ceiling downlights as one group, feature pendants as another, exterior spill as a third. Balance the groups against each other rather than tuning individual fittings, because a recessed downlight almost never needs to be right on its own — it needs to be right relative to the twelve next to it.
Budget for this honestly. On a dusk interior with a dozen recessed downlights, in our experience that's most of an evening, and the test renders are slow precisely because there are so many lights and every one of them turns up in the glass and the ceiling reflections. Set the long ones going before you go to bed. This is the point in the process where Enscape's real-time viewport becomes a thing you actively miss.
Exposure and sky, last
Do this after the lights, never before. The sky and the camera exposure are one coupled system, and every time you adjust a light you change what the correct exposure is. Locking exposure early means fighting it for the rest of the night.
If It's Friday and the Deadline Is Monday
Here's the route nobody offers, and on a real submission deadline it's often the right one.
Render the hero shot in V-Ray at whatever quality you can actually finish — plus the render channels. Depth, object ID, material ID, reflection, lighting passes. Then do the rest of the work in Photoshop.
Depth and ID channels give you clean masks for nothing: pull the background back, warm the interior independently of the exterior, deepen the glass, lift one wall. A good chunk of what people attribute to the render engine is a grading gap, and that's my honest read after a lot of side-by-side comparisons — contrast curve, warmth separation between inside and outside, a bit of bloom restraint where Enscape tends to blow out.
Which means the least efficient thing you can do with a Friday is keep re-rendering to fix something a curves layer fixes in four minutes.
On the licensing question, since it decides this for some people: V-Ray is a separate licence from Enscape. Chaos bundles them in various ways and the terms move, so get the current numbers from Chaos rather than from an article — but do check for a trial before you commit, because a one-off competition image is exactly the case a trial covers.
The Honest Recommendation
Render the baseline. Look at your actual frame. If it's a dusk interior, a glazing study or a close-up material shot, spend the evening — that's where the hours convert into something a judge can see. If it's a sunlit exterior with a big sky and a lot of trees, grade the Enscape image properly, put the saved time into the drawings, and submit.
The skill worth having isn't V-Ray. It's knowing which of your images V-Ray will actually improve, and having the discipline to leave the other four alone.