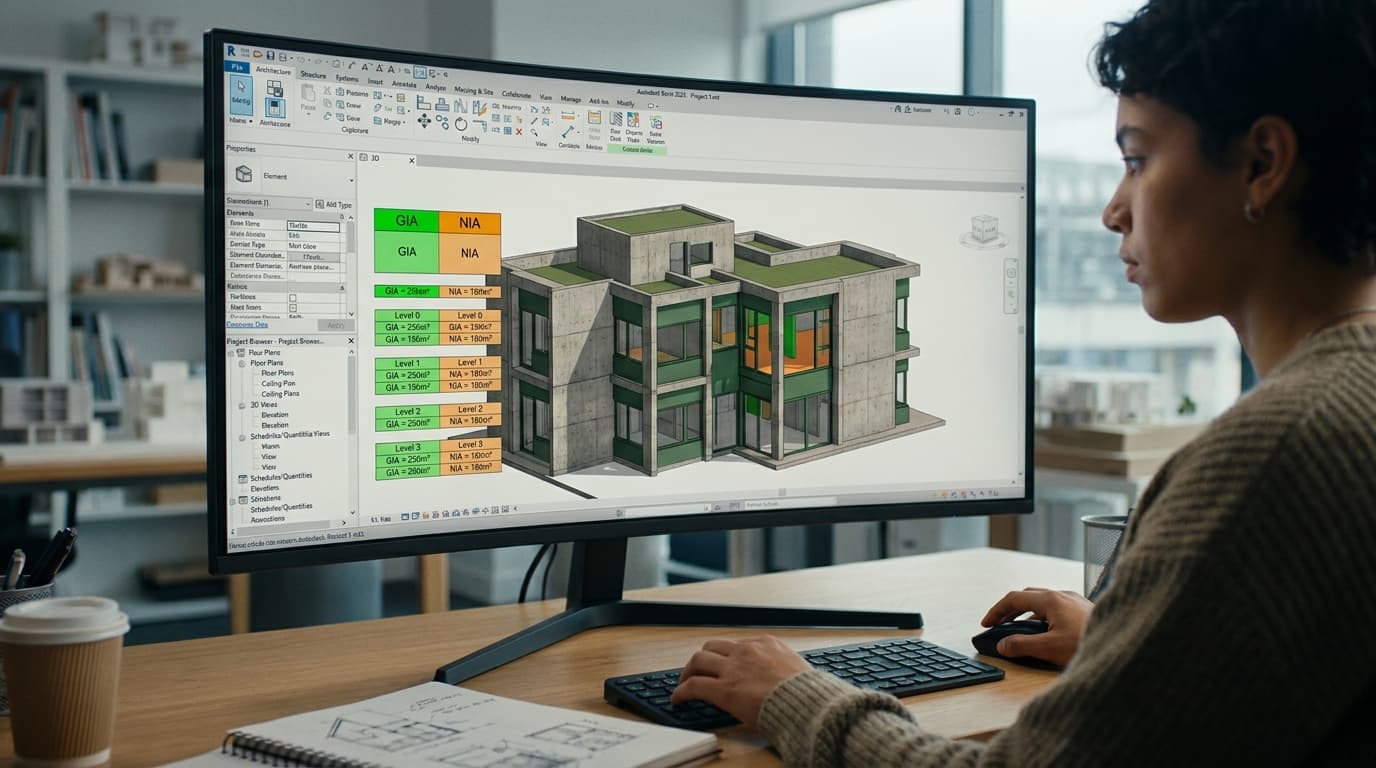
Two area schemes. Never one. One scheme for your gross figure, one for your net figure, boundaries drawn separately in each, and a schedule per scheme. That is the whole architecture of a reliable area set in Revit, and every problem people hit with areas — contaminated numbers, totals that don't reconcile, a GIA that quietly drops 40m² after a wall moves — comes from trying to make a single set of boundaries serve two standards at once.
The second half of the answer is that your boundary lines must be associated with the walls rather than drawn next to them, and your schedule must do its own arithmetic with calculated values rather than being typed into Excel by a human at eleven at night. Get those two things right and a late design change updates the client's numbers on its own. Get them wrong and it doesn't, and nobody finds out until someone else measures your drawings.
The Area Figure Is a Commercial Document, Not a Drawing Annotation
Here is the thing that makes this different from every other Revit task: nobody sues you over a wall type. The GIA you issue goes into a viability appraisal. The NIA goes to an agent who multiplies it by a rent and calls it an investment value. A developer's funding case, a residual land value, a sales brochure and quite possibly a contract sum all sit downstream of a number you produced by drawing pink lines in a view most of the team never opens.
Which means the risk profile is inverted from ordinary modelling. A wrong wall gets spotted in coordination. A wrong area gets acted on. And in our experience the moment it unravels is nearly always the same: the design changes at the back end of Stage 3, the model updates, the areas don't, and the figures the client has been working from for six weeks turn out to belong to a building you no longer intend to build. That is a phone call you'd rather not take.
So treat the area set as an issued deliverable with its own QA, not as a by-product of the model.
Get the Standard in Writing Before You Draw a Single Line
"Can you send us GIA and NIA" is not a brief. It is a category of brief. Ask which document.
GIA, under the RICS Code of Measuring Practice (6th edition), is measured to the internal face of the perimeter walls at each floor level. NIA is the usable area within that, and the Code sets out an explicit list of what comes out — cores, plant, WCs, internal structure and so on. I am deliberately not reproducing that list from memory, and neither should you. The exclusion list is the contract. Open the document your client has named, work from its wording, and if your scheme has anything awkward in it — a mezzanine, an undercroft, a converted loft with sloping ceilings — look up how that specific standard treats it rather than assuming. Guessing at an exclusion is how two competent professionals produce two different numbers for the same building.
IPMS is a separate standard with its own definitions and its own measuring faces, published by the International Property Measurement Standards Coalition and adopted by RICS in its property measurement professional statements. Do not assume NIA maps neatly onto IPMS 3, or that GIA maps onto IPMS 2. If a client asks for IPMS, that is a different set of boundaries, and — the position I'd defend in any meeting — a different Revit area scheme. Never two standards in one scheme. The moment one set of lines is asked to serve two definitions, you have lost the ability to prove either.
Write the standard and edition into the schedule title. "GIA — RICS Code of Measuring Practice" on the sheet is far less arguing later.
Rooms Are Not Areas, and Area Plans Are Not Floor Plans
This is the bit that catches Revit-competent people, because both objects report an area and both look fine in a schedule.
Rooms live on general arrangement floor plans. They are bounded automatically by whatever Revit finds around them — walls, curtain walls, structural elements — and that room-bounding behaviour can be switched off per element. Rooms are brilliant for the schedule of accommodation: name, department, area, volume, compliance checks against the brief.
Areas live on Area Plans, which are a distinct view type created per scheme, and they are bounded by area boundary lines you place deliberately. That deliberateness is the entire point. Room boundaries follow the building's physical geometry; area boundaries follow a measurement convention. GIA is measured to the internal face of the perimeter wall — not to the finish line Revit happens to think is the room edge, and not to a centreline.
Use rooms for accommodation and compliance. Use areas for the measured standard. Do not hand a client a room-area total and call it GIA.
Build Your Own Schemes. Don't Renovate Autodesk's.
Most templates ship with Gross Building and Rentable schemes already present. Leave them alone.
The Gross Building scheme has its own automatic behaviour — it will generate a boundary at the outside face of the building for you, which is not where GIA is measured. Rentable comes with its own leasing-oriented logic baked in. Whatever those schemes are for, they are not the UK GIA/NIA pair, and in practice you will spend longer fighting their built-in behaviour into shape than building clean ones from scratch.
So: Architecture tab, Room & Area panel, expand it, Area and Volume Computations, Area Schemes tab, New. Create one called GIA — RICS CoMP and one called NIA — RICS CoMP. Description field filled in properly. Name them so that a stranger opening the model in eighteen months knows what they are looking at.
While you are in that corner of the interface, set up your colour scheme and departments before you start placing areas — Colour Schemes, select the scheme, sort by name, then add your departments and their colours. One warning from the course, and it is a genuine irritation: Revit will not let you rename a department once it has been created. Typo it and your only route is to make a new one. Get the naming right first time.
Start the NIA scheme by copying the GIA boundary lines and pasting aligned into the matching NIA area plan, then cutting in the core, plant and the rest of the exclusions. What we've found is that this is both faster and safer than redrawing, because the perimeter is then demonstrably the same perimeter in both schemes — which is exactly the thing a QS will test.
Boundaries That Move When the Wall Moves
This is the single highest-value habit in the whole workflow, and it takes no extra time.
When you place an area boundary line, the options bar offers you a location line — Wall Centreline, Core Centreline, Finish Face: Interior, and so on. Pick the face your standard requires, and pick the wall. The boundary is now associated with that wall. Move the wall, and the boundary follows it. Change the wall build-up and the finish face moves with it.
Draw the boundary as a free line that merely happens to sit on the internal face today, and it is an orphan. It stays exactly where it was while the design moves out from under it, and your schedule keeps reporting a confident, precise, wrong number. That failure mode is silent, which is what makes it dangerous.
As a rule of thumb: if an area boundary is not associated with a wall, there should be a reason you could say out loud.
Make the Schedule Do the Arithmetic
Exporting to Excel and typing sums is where reliability goes to die. Revit will calculate, and it will recalculate.
Totals first, because the sequence is genuinely counterintuitive. In the schedule, open Sorting/Grouping, sort by your grouping field — level, department, block — and tick Footer, set to Totals only. Then go to Formatting, select the area field, and change the drop-down from No calculation to Calculate totals. Back to Sorting/Grouping and enable Grand totals with a title. Miss either half and you get a footer with nothing in it, which is how most people conclude the feature is broken.
Then calculated values, which are how you stop checking things by eye. Add project parameters to rooms for the thresholds you care about — say Minimum Required Area, set as an Area-type parameter, instance rather than type — then in the schedule's Fields tab click the calculated value button:
One quirk worth knowing before it eats an evening: Revit's formula engine is unit-aware and parameter names are case-sensitive and must match exactly. Writing if(Area < 12, ...) will not do what you expect, because a bare number in an area comparison is not read in your project's display units. Keep every threshold as an Area-type parameter and compare parameter to parameter, and the problem never arises. That is why the course sets the thresholds up as parameters rather than typing numbers into formulas — it isn't fussiness, it's the only version that behaves.
The calculated value dialogue also offers Percentage, which gives you each department as a percentage of the grouped total. Net-to-gross efficiency by level, computed and re-computed by the model, is a far better thing to hand a developer than a static figure.
The Pre-Issue Check
Before anything with an area total on it leaves the office, five minutes:
Levels. Confirm every occupied level has an area plan in both schemes. In our own projects this is the single thing we check first, because a missing plant level or mezzanine understates GIA without producing a single error message. Nothing in Revit tells you a floor is absent from a scheme. You have to go and look.
Boundary gaps. A broken loop means the area either swallows the neighbouring space or refuses to compute. Colour fill makes this visible in one glance — an area bleeding into the corridor is obvious in colour and invisible in a table of numbers.
Association. Spot-check boundaries at the perimeter. Are they attached to walls, or floating?
Rounding. Set the precision explicitly in Formatting > Field Format, in m² to two decimal places, and then actually add up the displayed rows against the displayed total. We have been caught out by a total that didn't match the visible rows because of how the displayed values were rounded, and a client's spreadsheet will find that discrepancy before you do.
Cross-check. Take one floor and measure it by hand. If your hand measurement and your schedule disagree, you have learned something cheaply.
Hand It Over Without Handing Over Control
When the schedule is right, export it properly: File > Export > Reports > Schedule, save as CSV, enable all the check marks, pick a delimiter and remember which one you picked.
Then do not open the CSV in Excel. In a fresh workbook, go to Data > Get Data > From Text/CSV, point it at the same file, match the delimiter, and load. That builds a live query rather than a dead paste. When the design changes, you republish the CSV from Revit over the same file, hit Refresh in Excel, and every piece of conditional formatting, every chart, every appraisal formula the client's agent bolted on survives intact.
That is the difference between an area set that is a snapshot and one that is a system. The snapshot is true on the day you made it. The system is true on the day someone reads it.
The uncomfortable truth is that most Revit-competent architects are still measuring by eye and typing into spreadsheets, on projects where the number carries more commercial weight than anything else they issue. It takes an afternoon to set up properly and it removes an entire category of professional risk. Do it on the next project, before someone asks for the numbers.